Getting Started
Welcome to the Facility Maintenance application, built on SignalSync. This integrated system is designed to manage the entire lifecycle of corrective and preventive maintenance within your organization.
This guide covers the essentials of accessing the application, understanding user roles, and navigating the main interface.
General Workflows Overview
The application handles two main types of processes:
- Corrective Maintenance: Reactive work initiated by a Client when a problem occurs (e.g., "Broken door"). It involves reporting, classification, execution, and verification.
- Preventive Maintenance: Planned work generated automatically by the system to prevent failures. It involves scheduled checklists and routine inspections.
Access & Login
To access the application, navigate to the provided SignalSync URL. You will need your organization-issued credentials.
How to Log In
- Enter Credentials: On the login screen, enter your Email address and Password.
Click to view the login screen
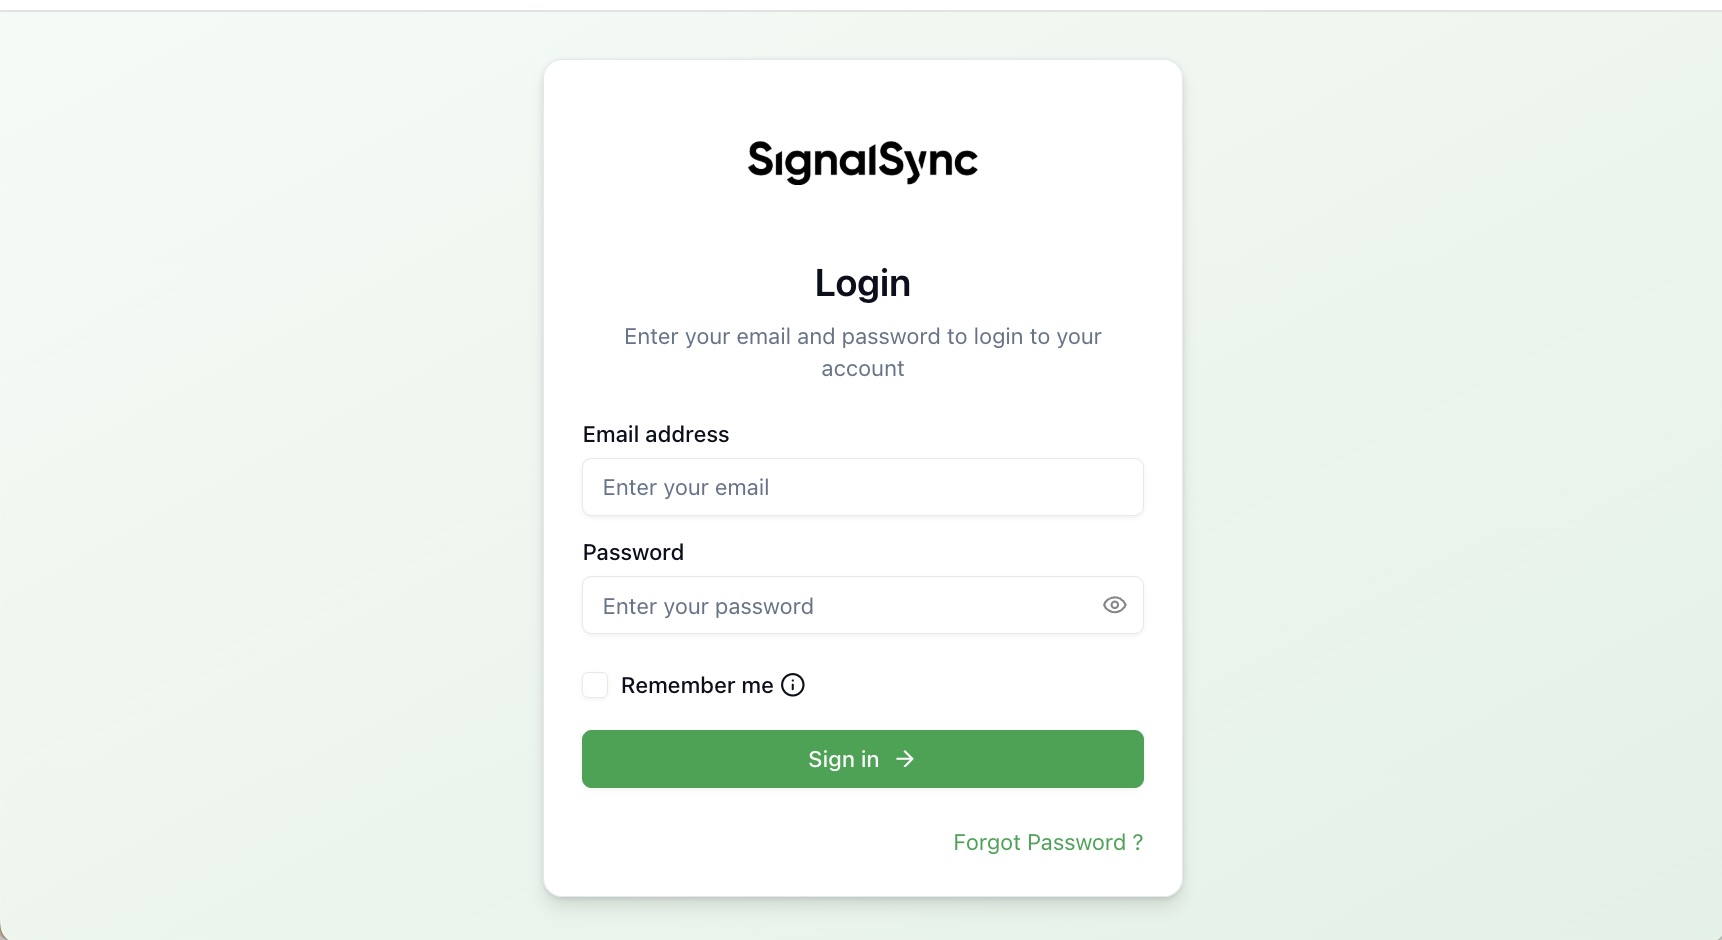
If you check Remember me, the application will keep your session active after closing the browser.
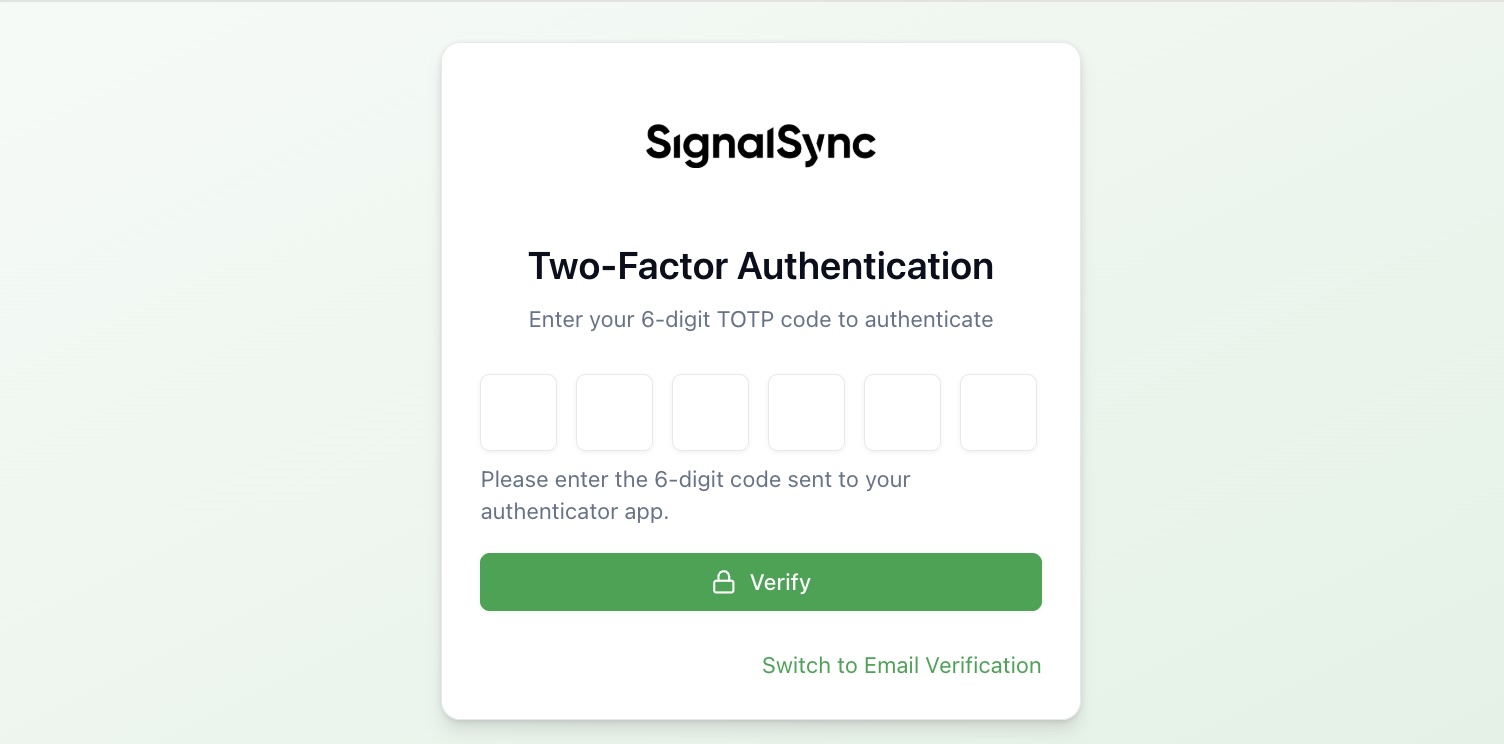
- Two-Factor Authentication (2FA):
- Upon your first login, you may be required to set up 2FA.
- Scan the QR code displayed on the screen using a TOTP app (e.g., Microsoft Authenticator, Google Authenticator) on your mobile device.
- Enter the code generated by your app into the Enter OTP field and click Enable 2FA.
- For subsequent logins, simply enter the code from your authenticator app when prompted.
Click to view the 2FA setup screen
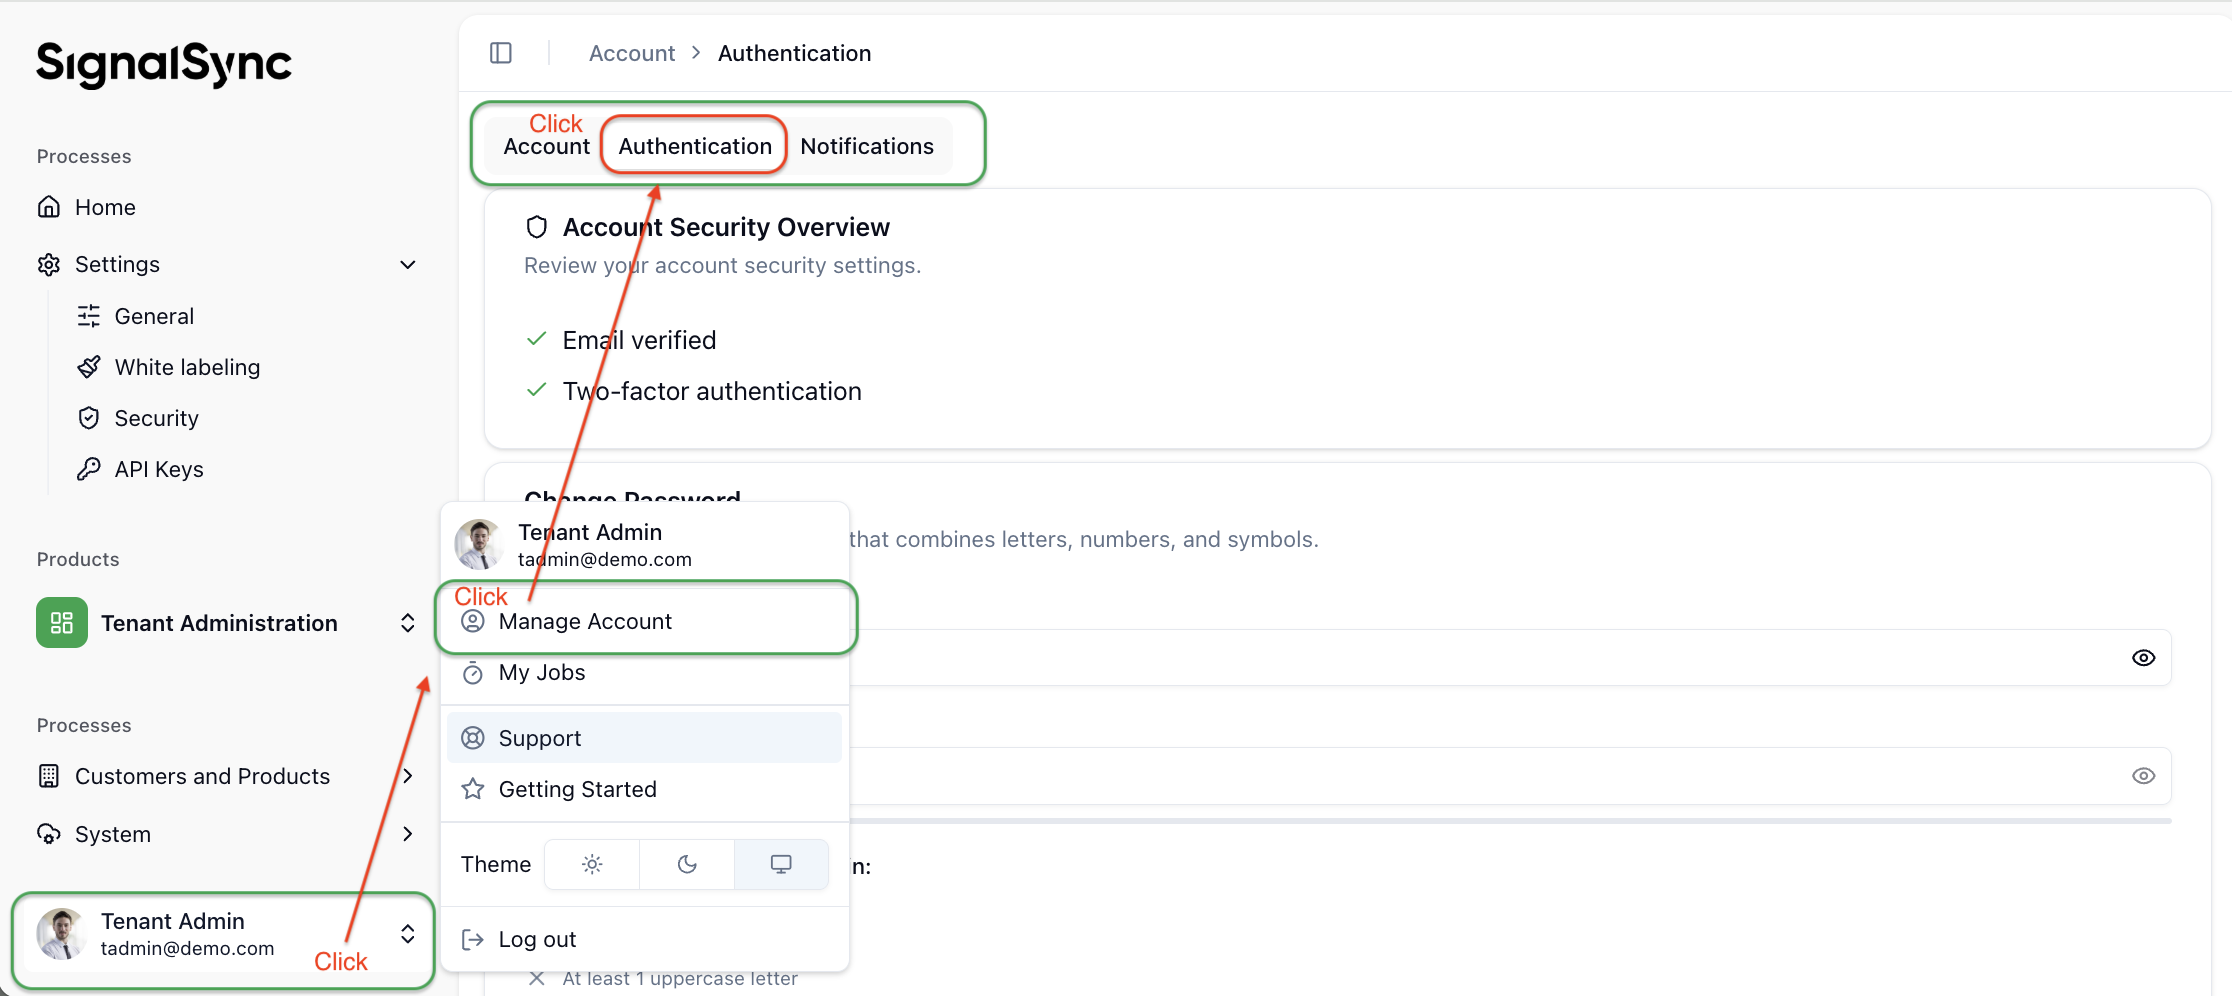
How to Disable Two-Factor Authentication
Click on Processes in the navigation menu (currently showing the Account section) → Click Manage Account → Click Authentication.
Click to view the User Profile screen
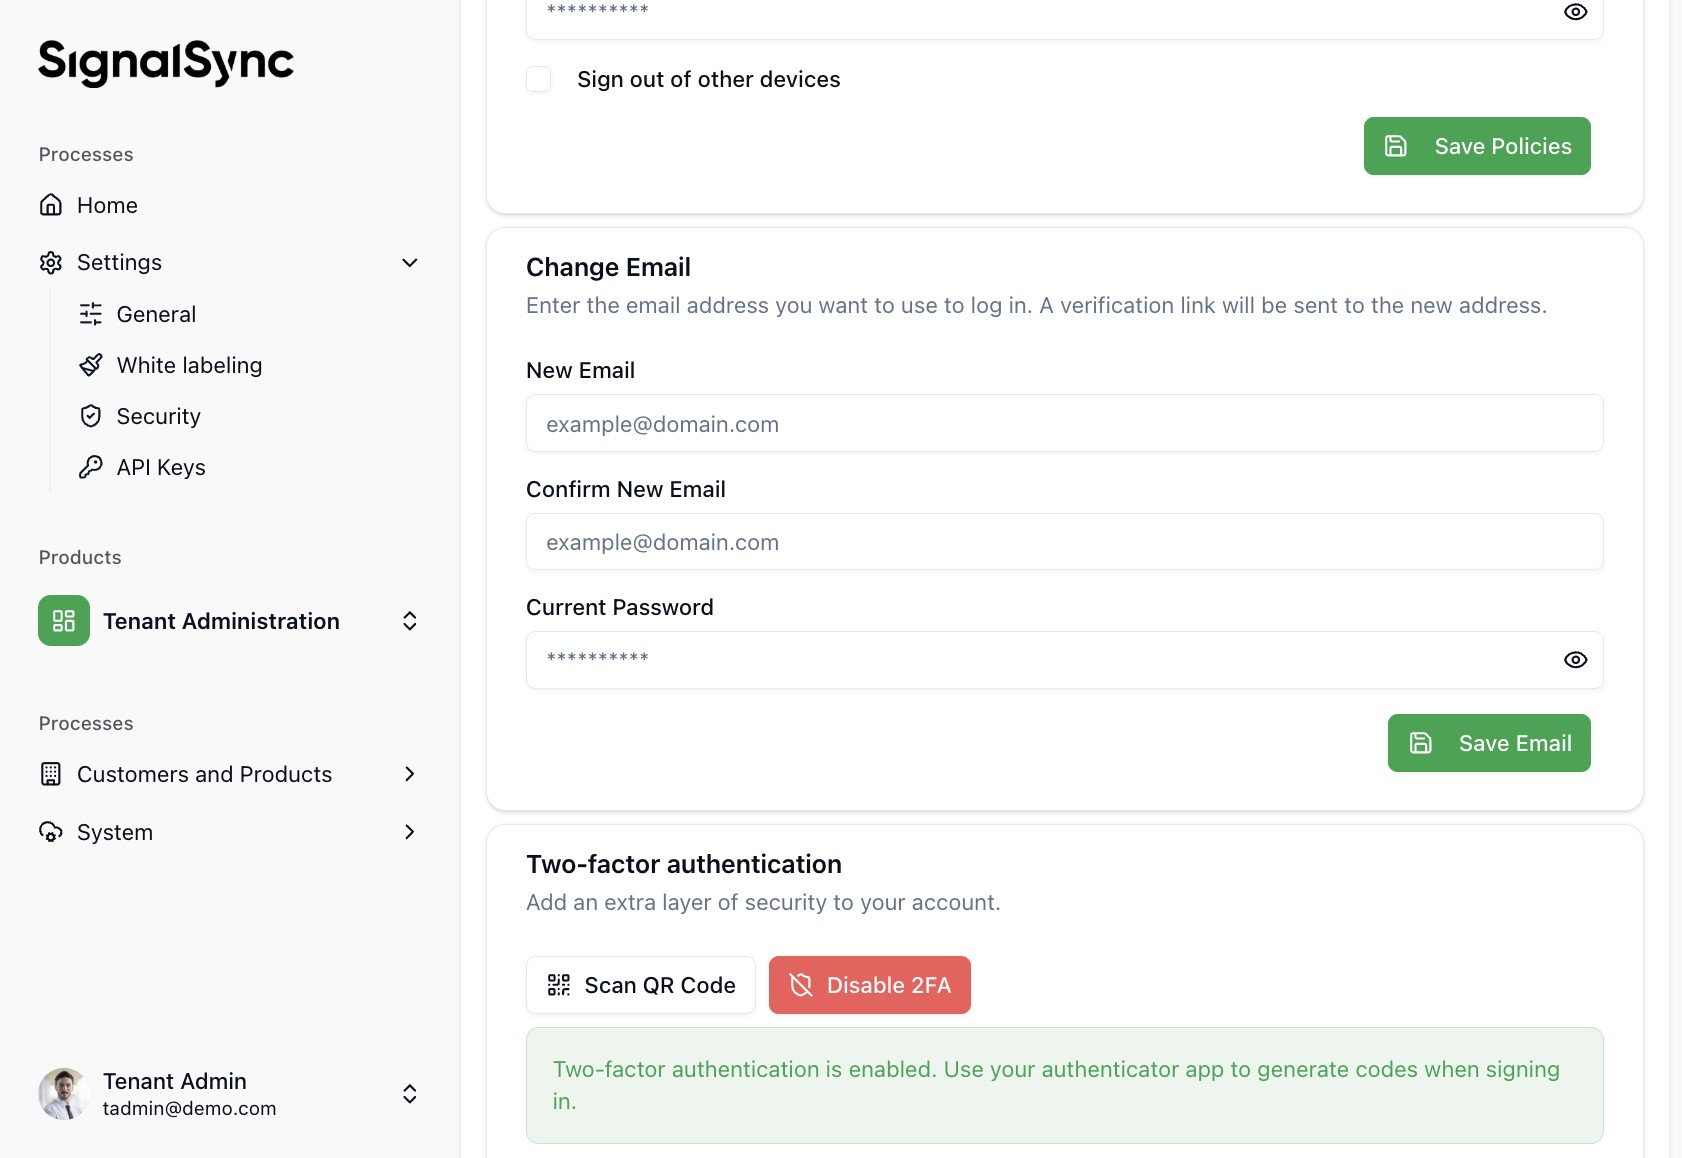
Locate the Two-factor authentication section and click the Disable 2FA button. A modal window titled Disable 2FA appears, prompting for your password.
Enter your account password in the Password field and click Disable 2FA. After this step, 2FA is disabled.
Click to view the Disable 2FA screen
User Roles & Responsibilities
The application workflows are driven by specific user roles. Your view and available actions depend on the role assigned to you:
| Role | Key Responsibilities |
|---|---|
| Client / Requester | Reports incidents (Corrective Maintenance). Confirms the resolution and closes the incident. |
| Supervisor | Classifies incidents and assigns them to Service Providers. Approves cost estimates and solutions. Verifies the quality of executed work. |
| Facility Manager | Provides high-level approval for cost estimates. |
| Service Provider | Executes maintenance work. Creates cost estimates. Documents activities, materials used, and labor time. |
Navigating the Interface
Once logged in, you will interact primarily with two main areas depending on your role: the Navigator (usually identified as the left menu of the application), the Service Catalog, and the Maintenance Console.
The Navigator
This is the starting point for opening any Product, Homepage, Process, or Operational View.
Click to view the Navigator
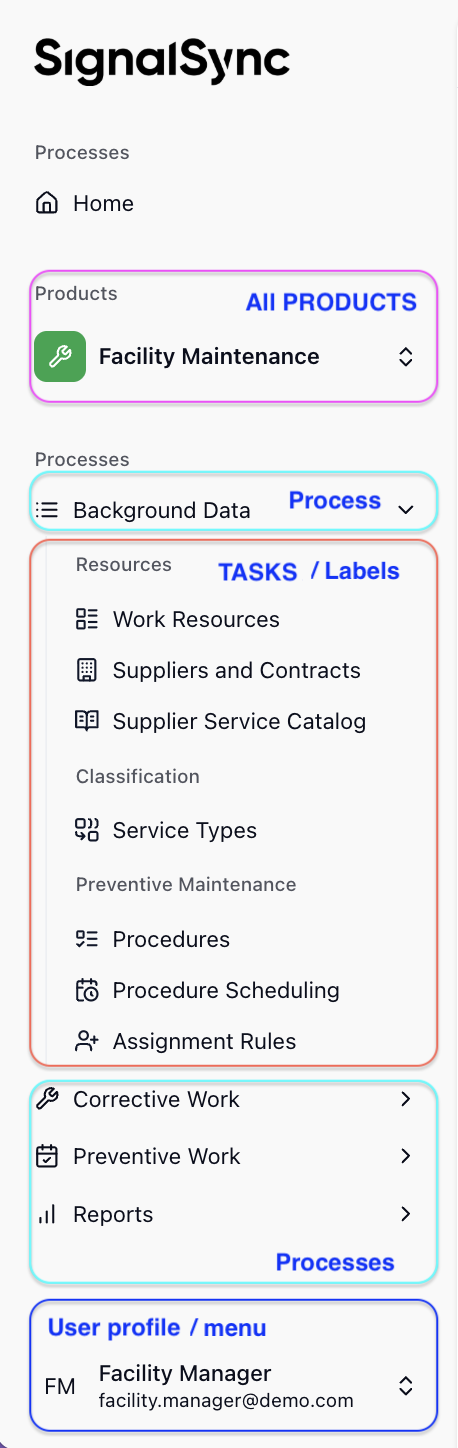
The main components of the Navigator are:
- Home — Clicking Home returns you to your default Homepage.
- Products — Presents the Process Menu for the selected Product.
- Processes — Presents the Processes from the currently selected Product. A Process is used to logically group a set of Tasks and/or sub-processes.
- Task — Opens the corresponding View, Report, Homepage, or Form for you, or executes an Action as a result of a click in the Navigator. A Task is used to show a specific screen to the user to enter or consult data.
- User Profile — Presents the specific user menu, which allows the user to:
- Switch the theme between Day and Night mode
- Request Support
- Open this Help file
- Manage Account — Various settings can be configured here, such as changing the application language, viewing notifications, uploading a photo, and enabling/disabling 2FA.
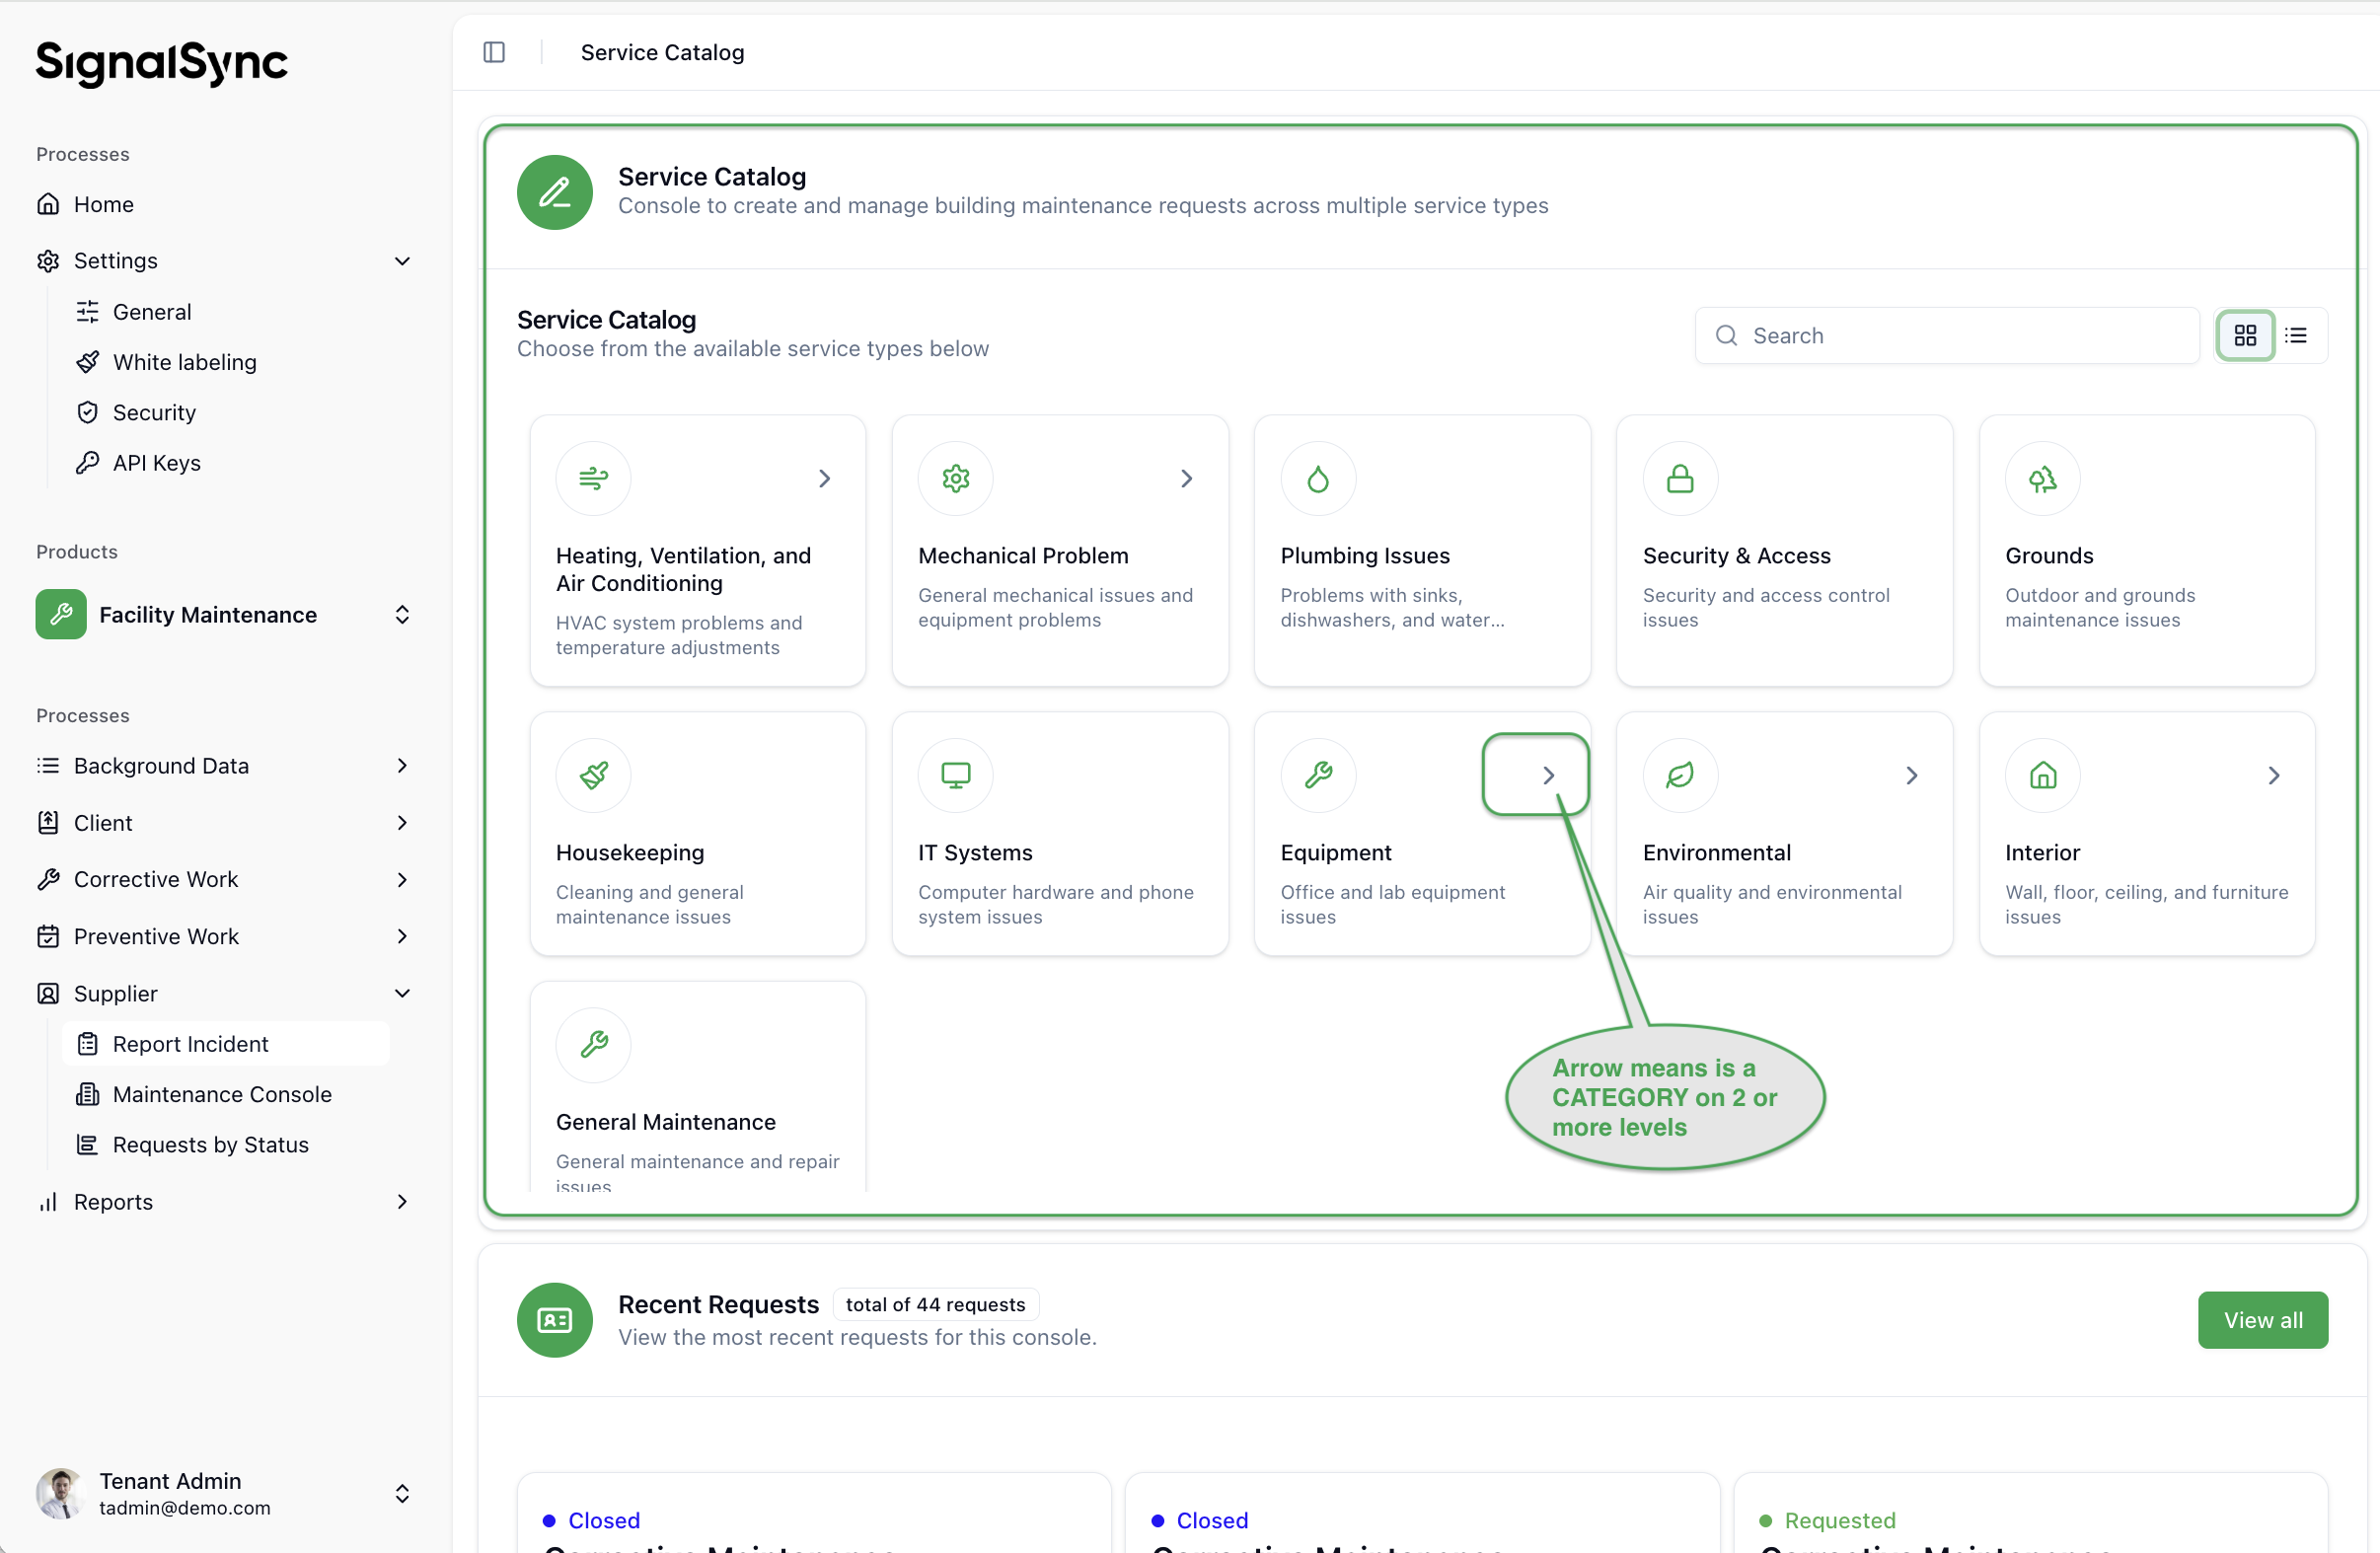
The Service Catalog
This is the starting point for reporting new issues. It displays visual categories for different types of maintenance (e.g., Electrical, HVAC, Sanitary, IT Systems).
- To report an issue: Select the relevant category icon to open the reporting form.
Click to view the Service Catalog
The Maintenance Console
This is the central dashboard for managing ongoing requests. It provides a high-level view of the current workload.
- KPI Cards: At the top, you can see summary metrics such as "Total Requests," "Requests In Progress," or "Closed Requests".
- Views: You can toggle the display of requests between a List View and a Card View depending on your preference.
Click to view the Maintenance Console
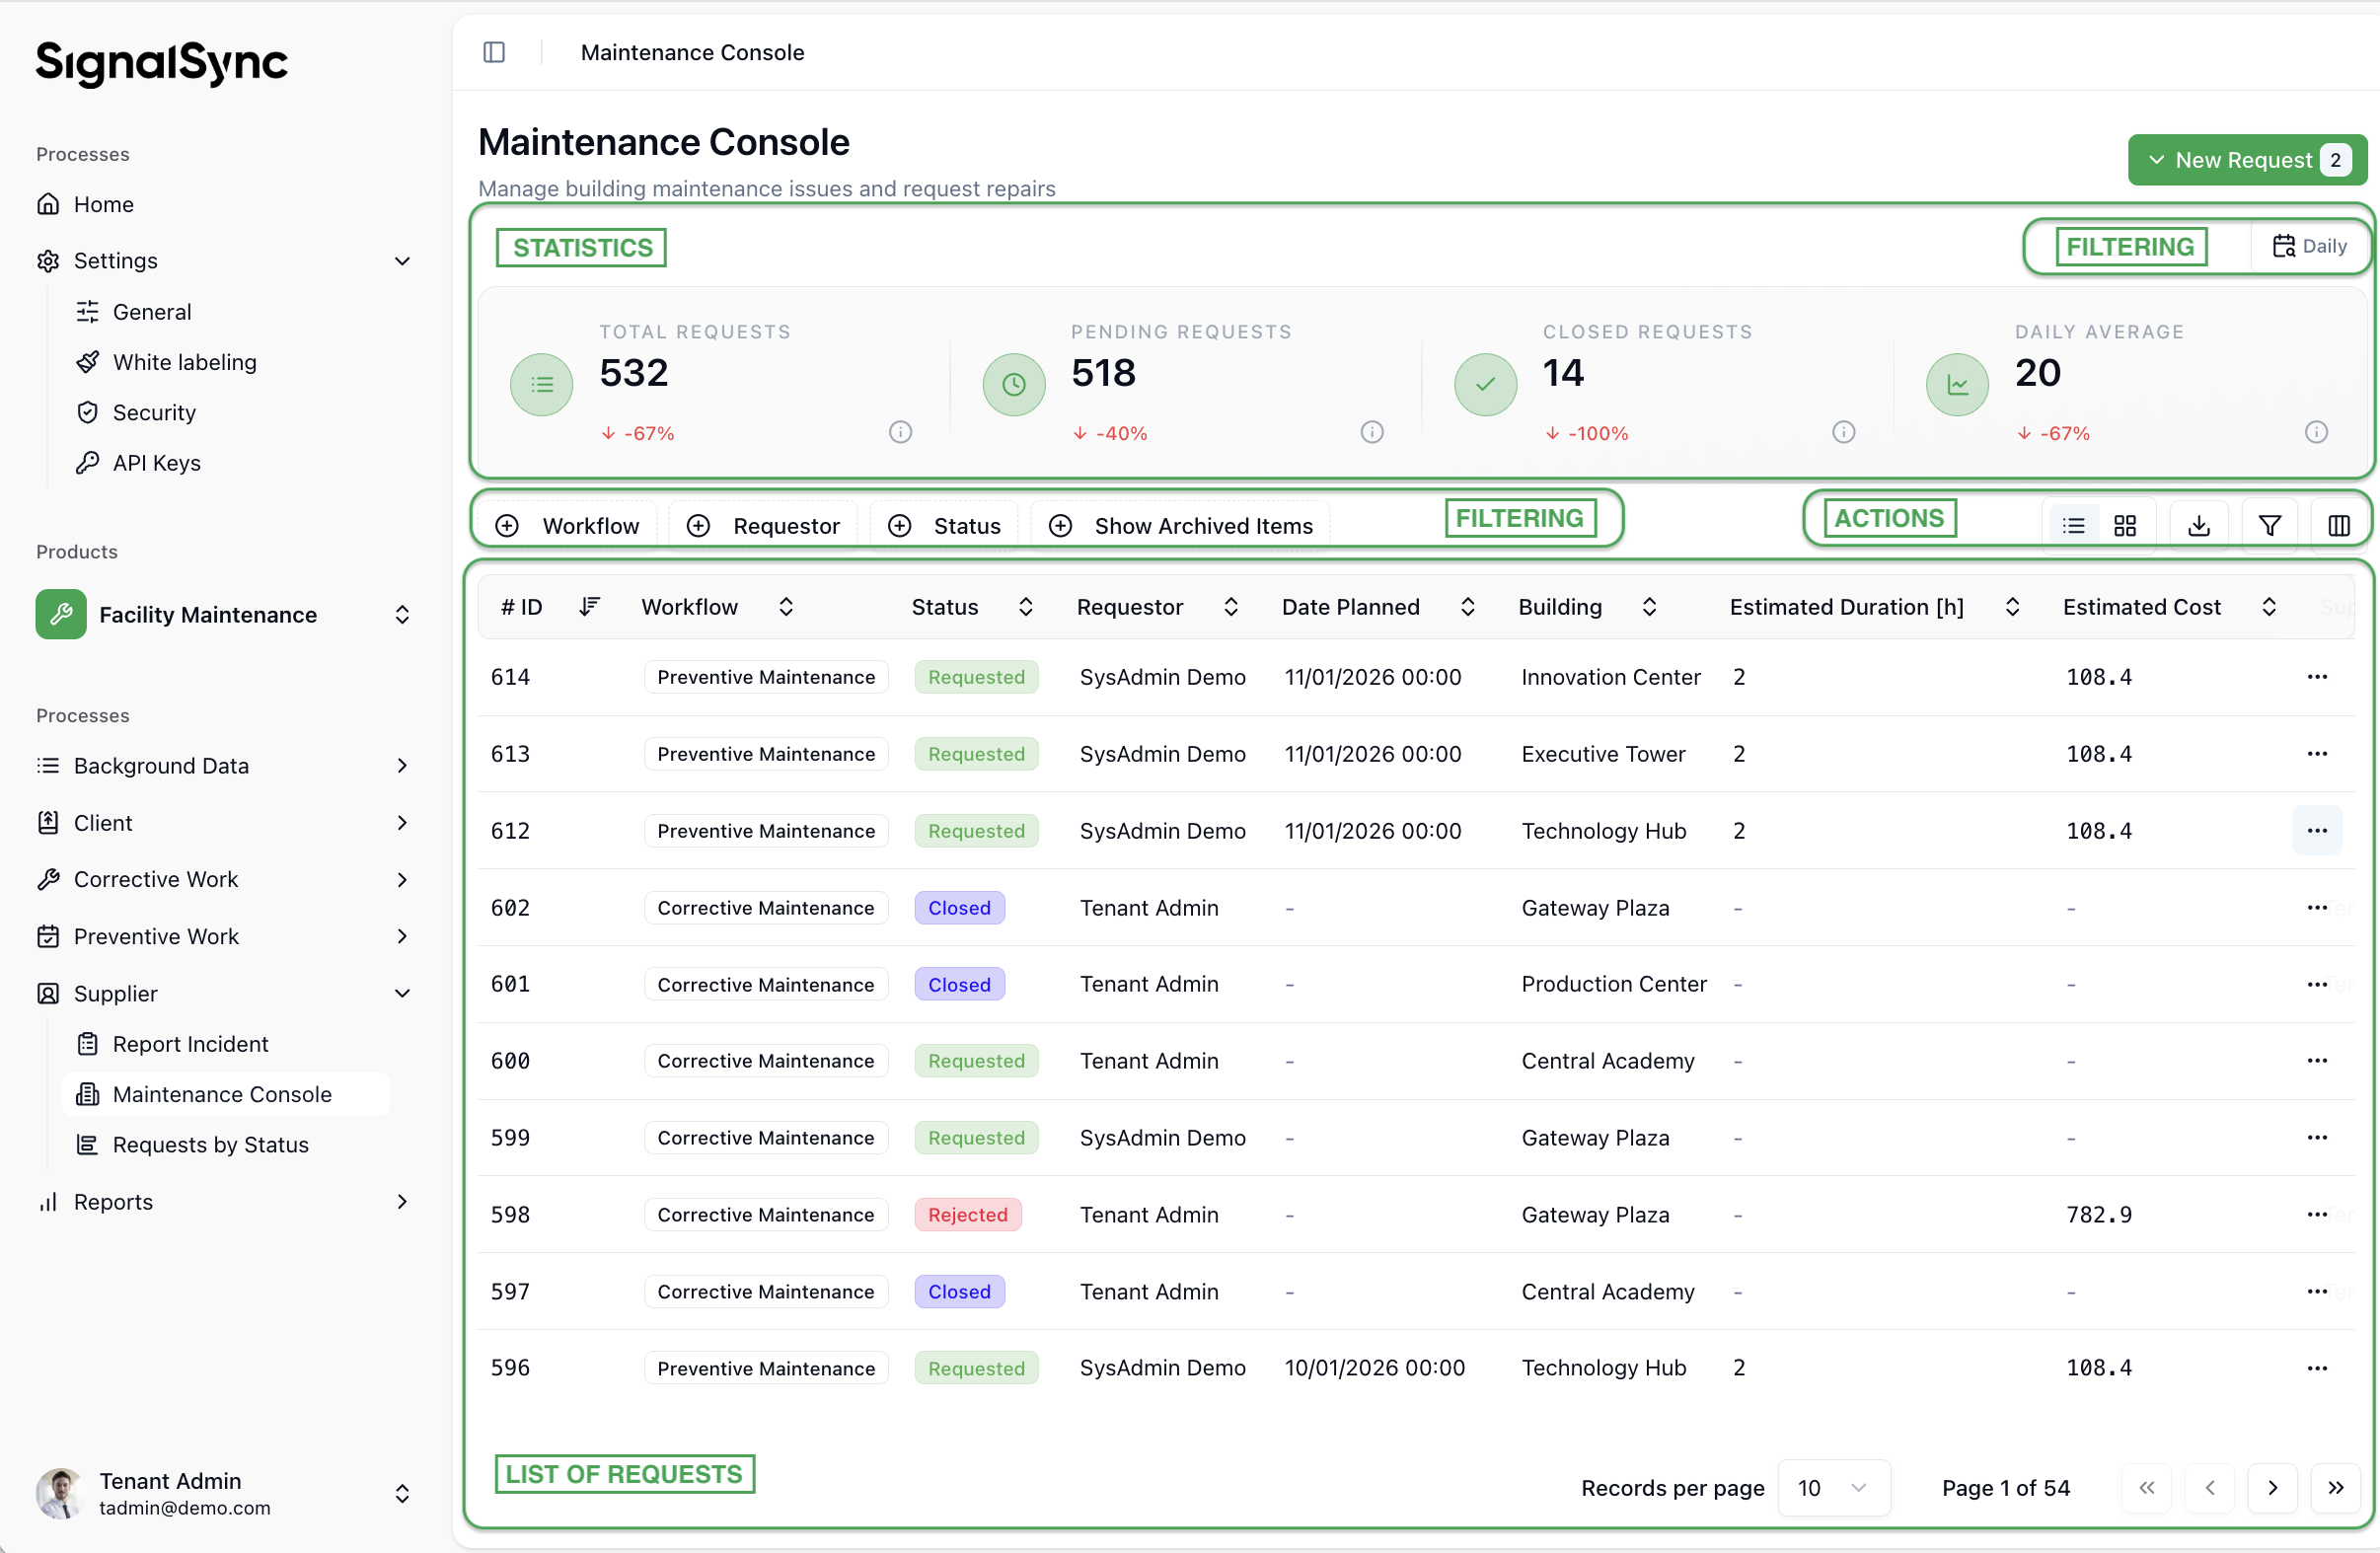
Filtering and Sorting
To find specific requests easily, use the toolbar at the top of the list:
- Filtering: Click the Filters button. You can filter by Status (e.g., "In Progress," "Approved"), Priority, or other fields.
- Sorting: Use the sort options to arrange requests by date, priority, or ID.
- Export: Click the export icon to download the current list of incidents as a CSV file for external reporting.